Determining Fertility in Your Breeder’s Eggs
Kristen Reeves, Meadowlark Farms Avian Supply, Inc.
On average in MY aviary, eggs remain viable for up to 7 days after being laid. If the eggs are brooded consistently before the 7th day, chances are those eggs will hatch if fertile. In large clutches – greater than 7 eggs – I often find that the first few eggs laid will not become viable because my hens don’t always brood until they feel the entire clutch is laid. I have hens that lay as few as 2 or 3 eggs and as many as 13+. I only allow my hens to raise 6 chicks at a time – maximum. Any other eggs are either moved until another Gouldian pair or to the brooder. Occasionally I will use fosters, but not often.
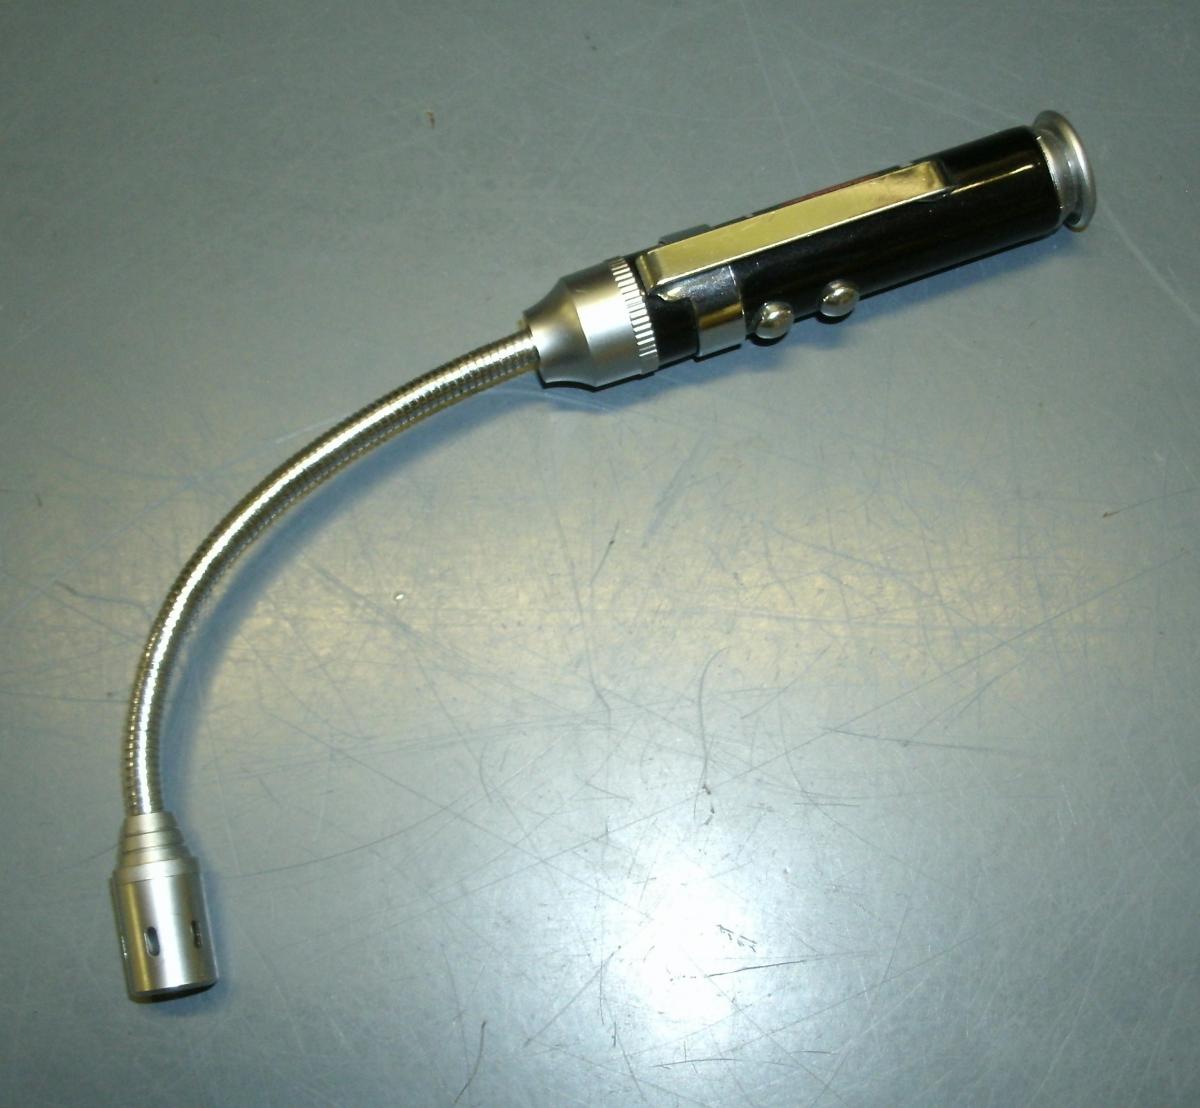
When candling eggs, light will make all the difference in what you can and cannot see. The smaller and brighter the light source, the easier it will be to direct the light into the egg. I use a small Flexi-Light LED flashlight as a candler. In my humble opinion it works far better than anything else I’ve tried. The batteries are easily acquired and replaceable, and the bulb lasts a lifetime. But this is a great candler too! Egg Candler
When candling, always place the light at the “fat” end of the egg where the air pocket is located. Initially, you can place the light source right against the egg, but you may need to move the light away, or adjust the position of the light to see anything within the egg.
DAY 1 – before brooding
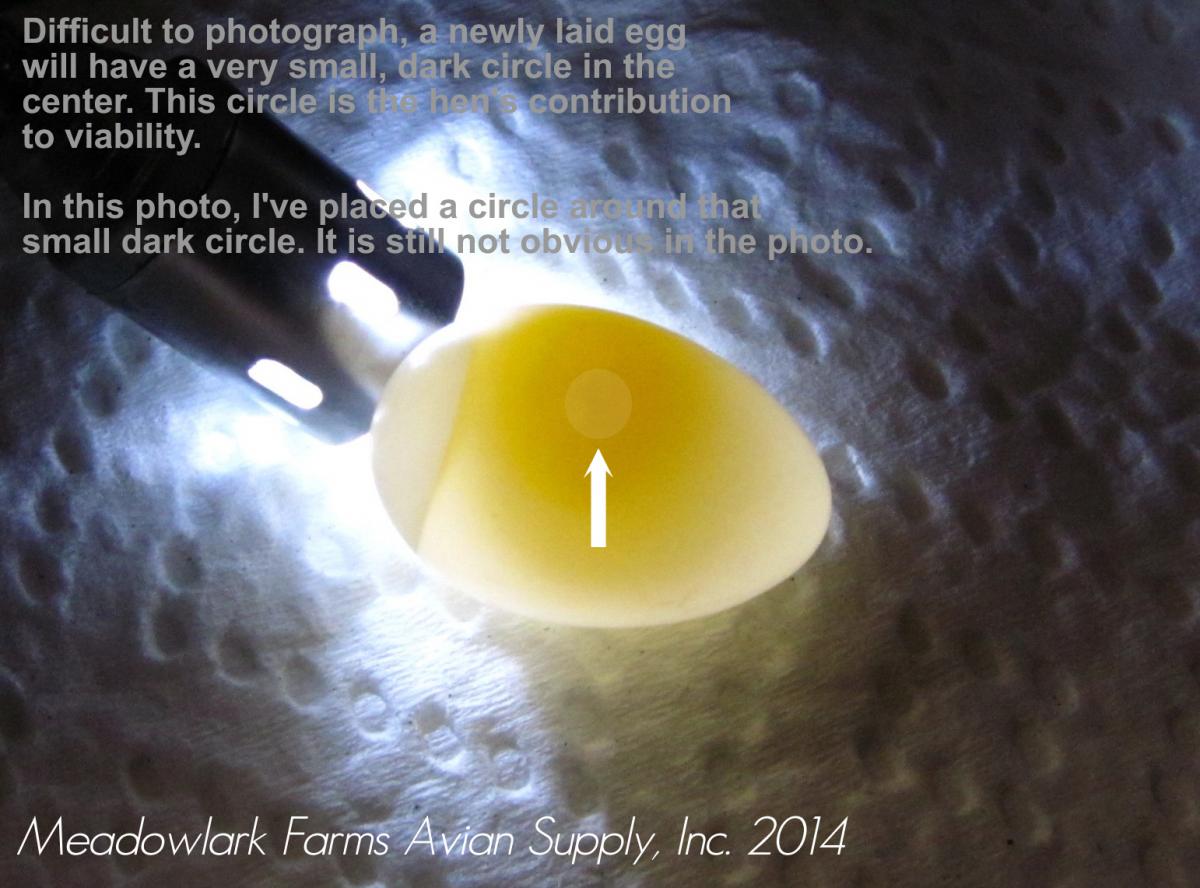
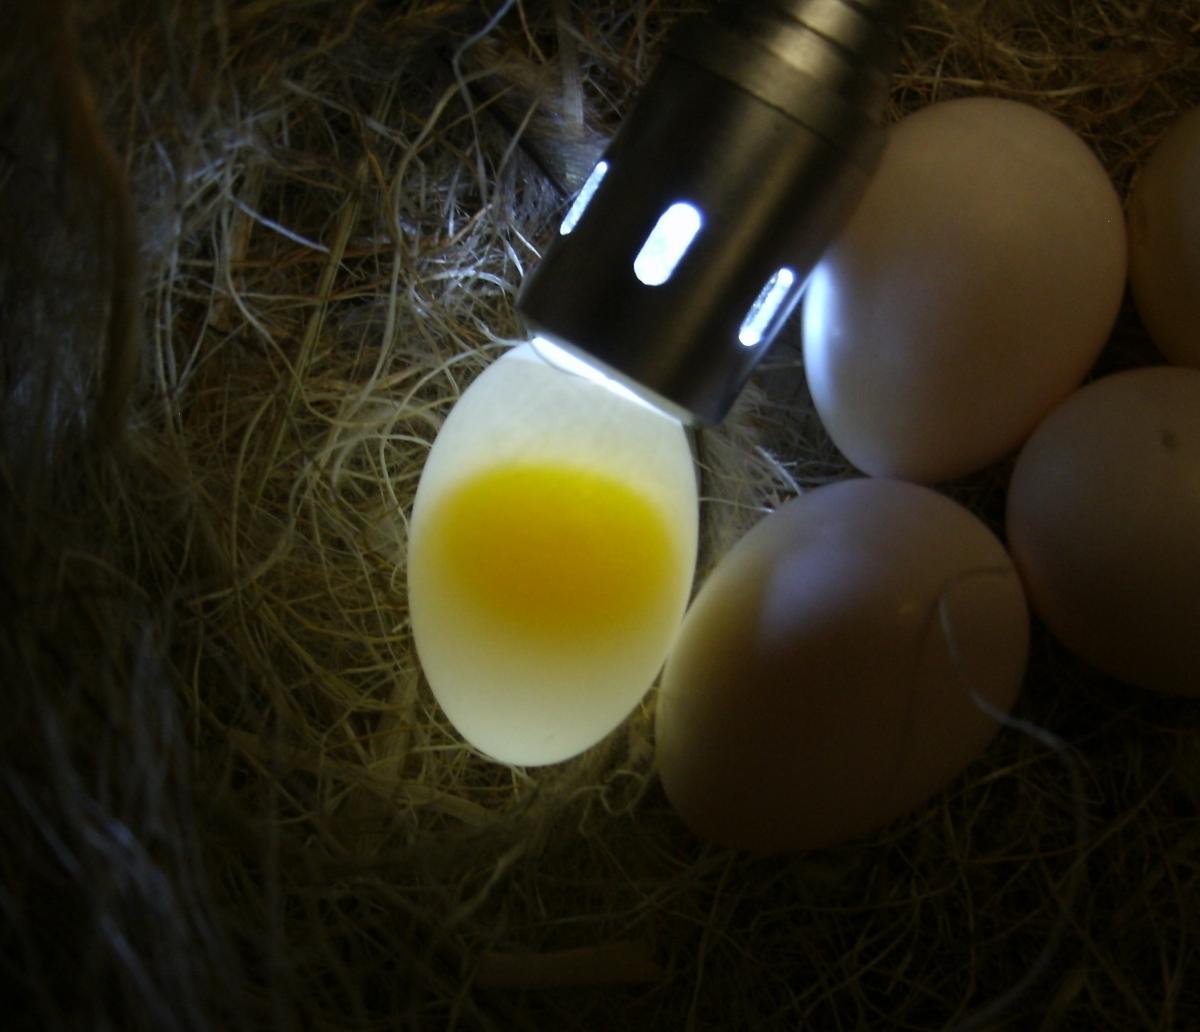
If the hen is fertile, there will be a lemon yellow yolk with a very small, dark circle in the center. This is the “hen’s” contribution to viability of the egg. The circle is so small that it is very difficult to photograph without a really good camera. If that circle is not there, chances are the egg will not be fertile. However, I do not remove these eggs just yet.
Sometimes I can’t get the light right to see that circle early on, especially if I’m attempting to candle the eggs while still in the nest. It is always easier to candle when you remove the nest from the cage, and then remove the eggs from the nest. But that is not always a good idea for every species or even every pair. If your birds are comfortable with your hands in the cage and removing the nest, then feel free to do so. But if the pair is skittish, you should not bother them too often. I would suggest candling only once at about 5 days after consistent brooding.
DAY 2 – after brooding commences
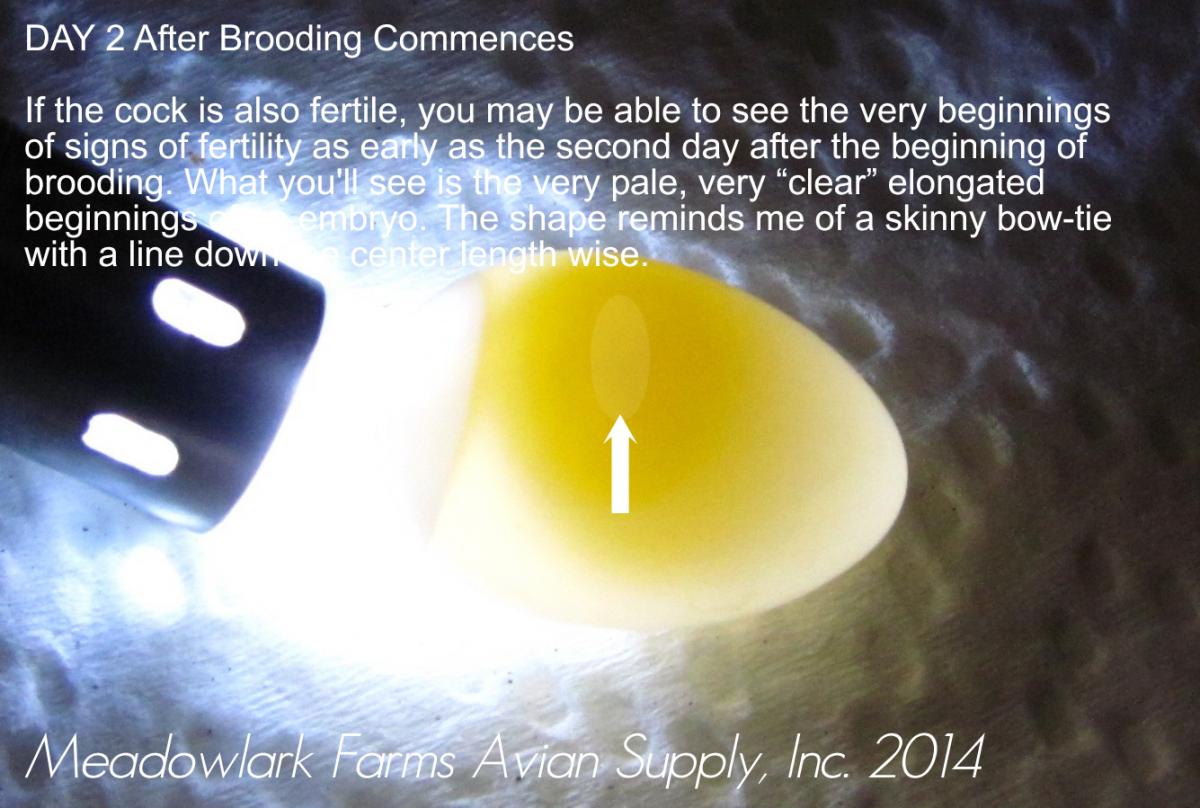
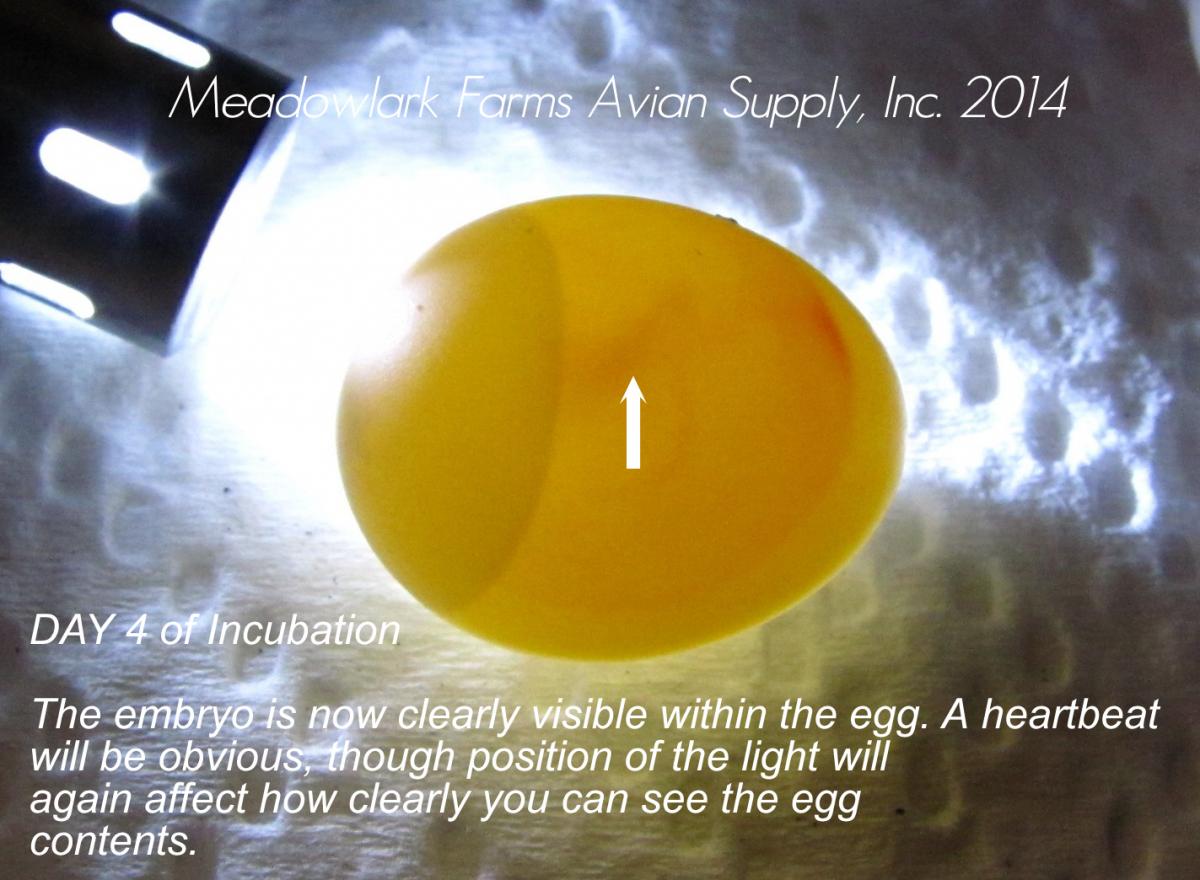
If the cock is also fertile, you may be able to see the very beginnings of signs of fertility as early as the second day after the beginning of brooding. What you’ll see is the very pale, very “clear” elongated beginnings of an embryo. The shape reminds me of a skinny bow-tie with a line down the center length wise.
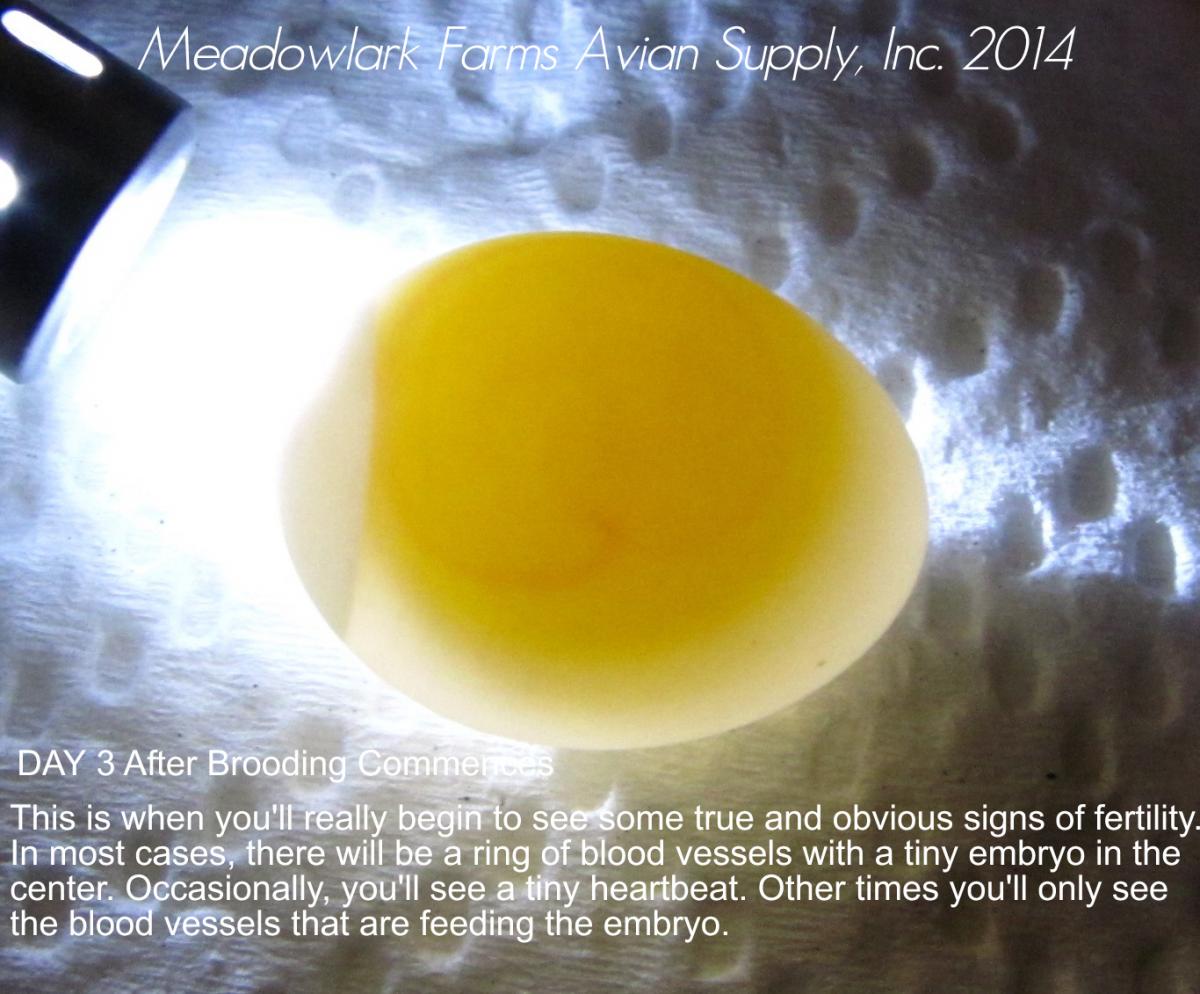
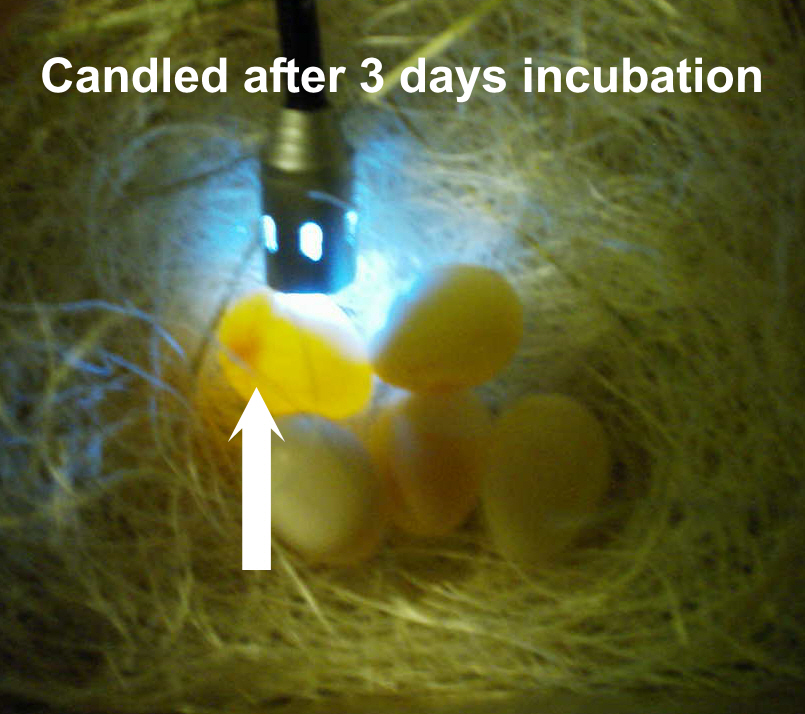
DAY 3 – after brooding has commenced in earnest
Issues you may find when candling eggs -
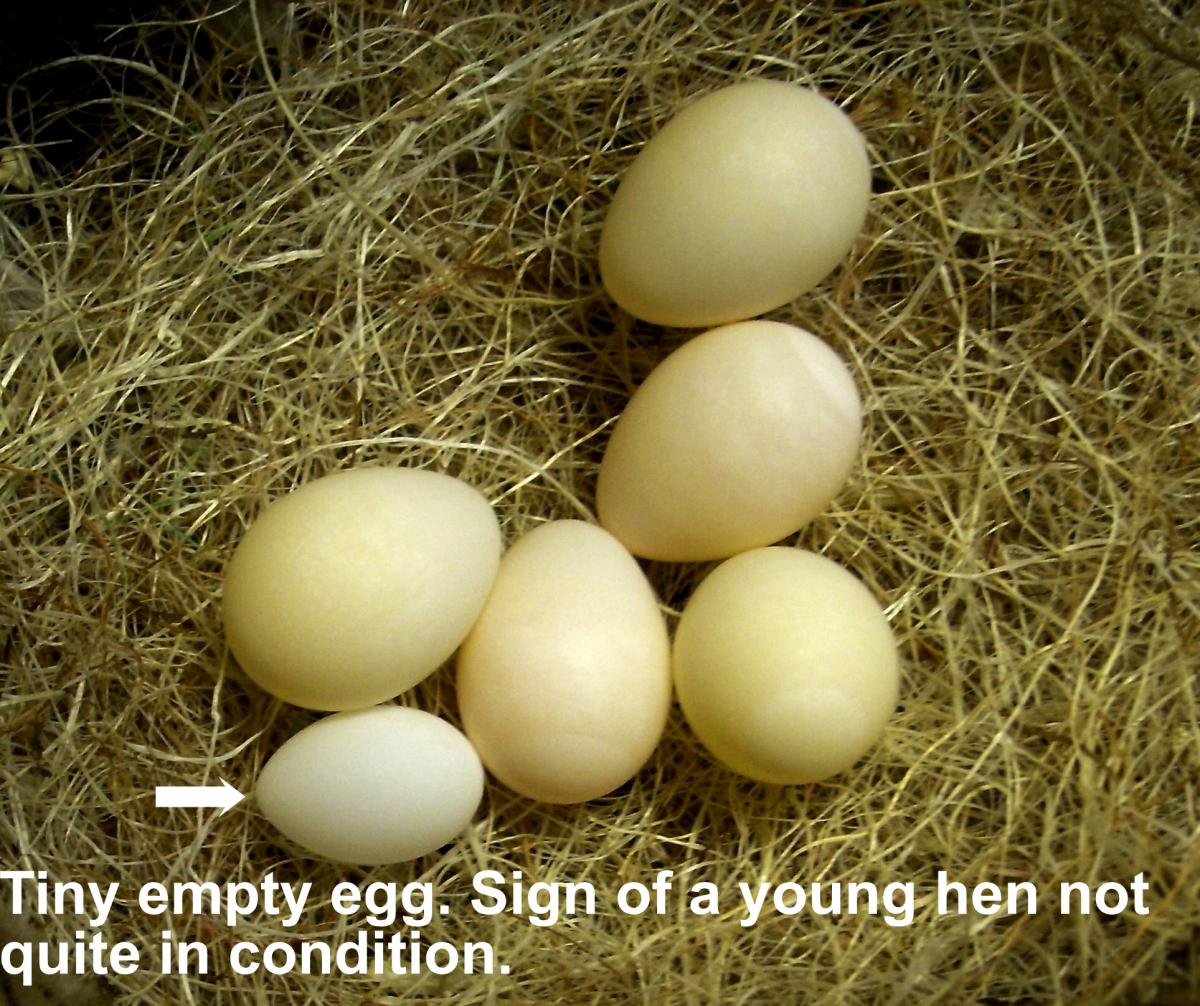
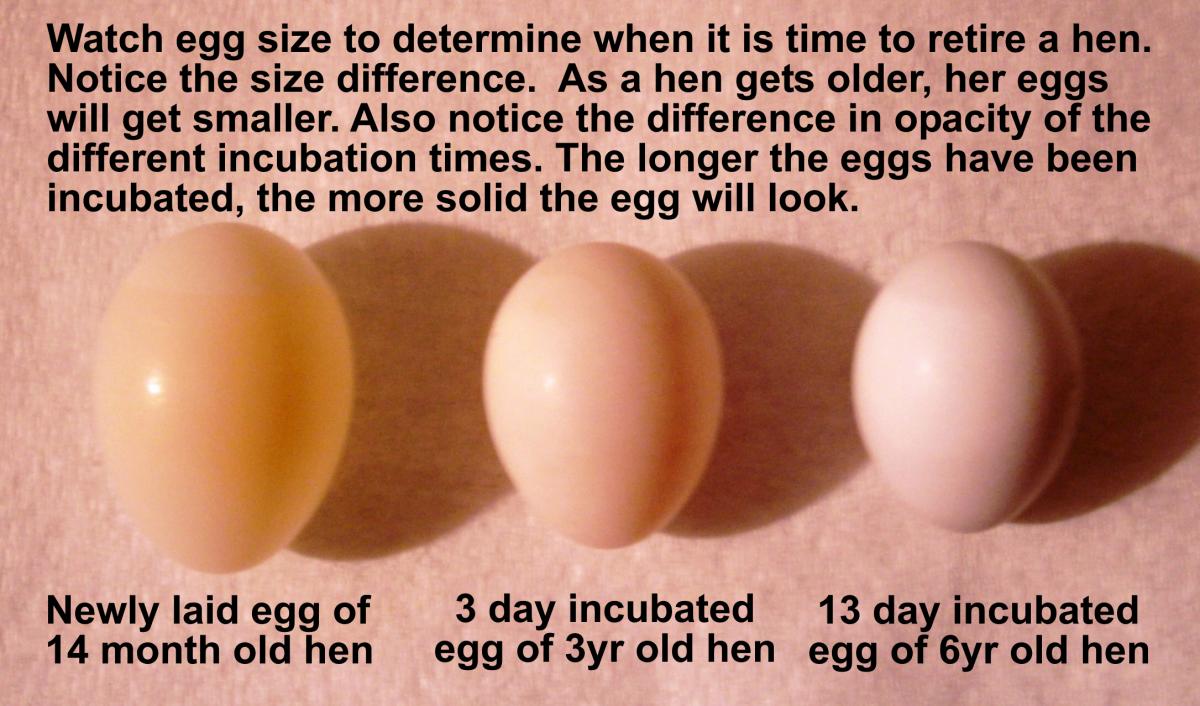
In an infertile egg, the yolk will slowly turn from a “fresh” lemon yellow color to a deep honey-yellow. There may or may not be a dark circle in the egg (hen’s contribution). If all other eggs show signs of fertility after 5 days incubation and you have an egg that still hasn’t begun to show signs, you can safely remove this egg.

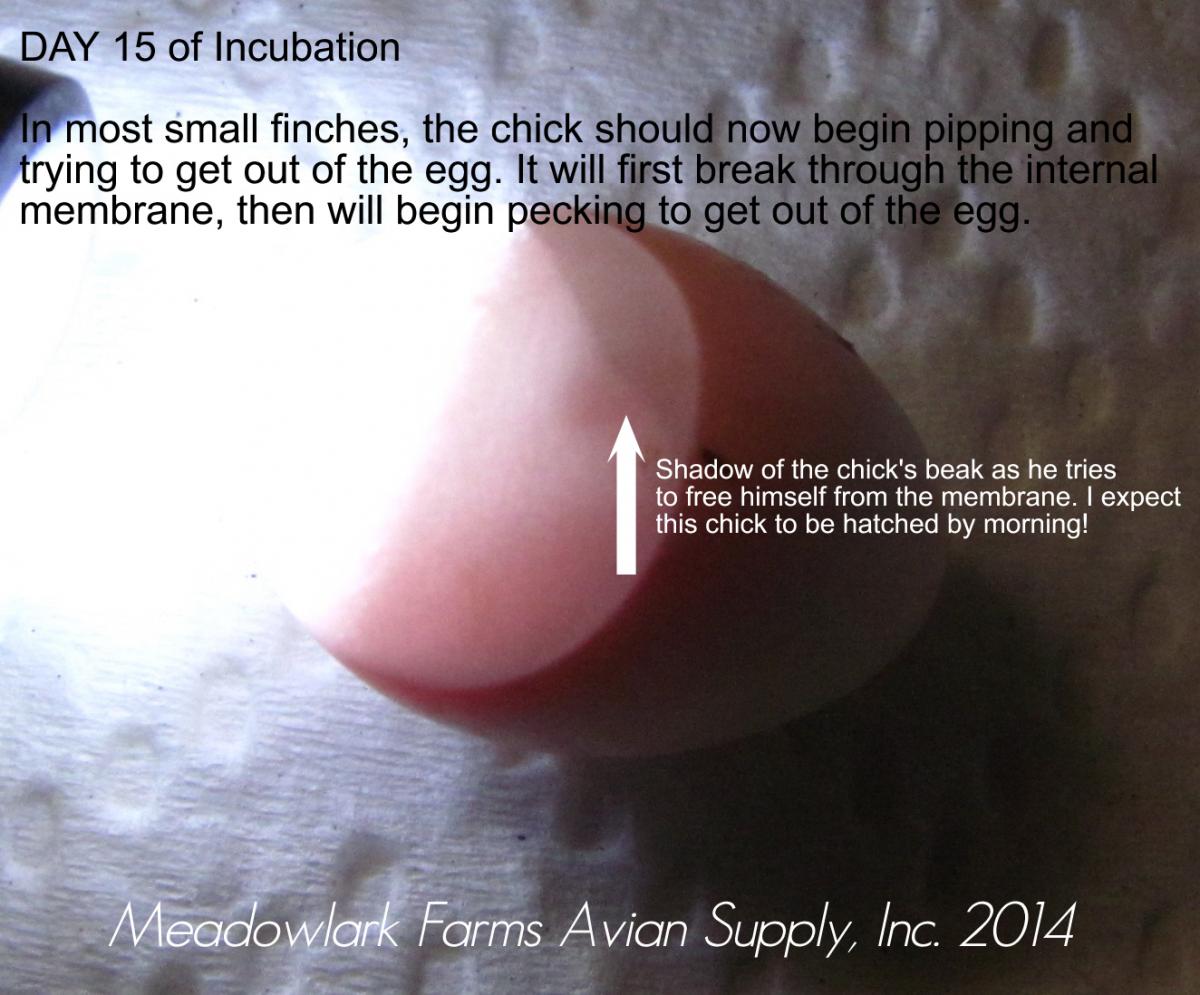
Dead in Shell chick. The egg contents begin to look yellow and sickly. The blood vessels no longer appear fresh and may turn brown. The outside of the egg begins to show signs of discoloration. This should NOT be confused with a pipping chick. Always candle the egg before removing from the nest to ensure you aren’t seeing an egg ready to hatch!
.JPG)
.JPG)
Infertile & addled eggs:
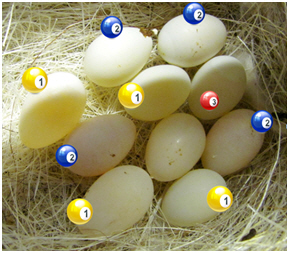
1 – Infertile
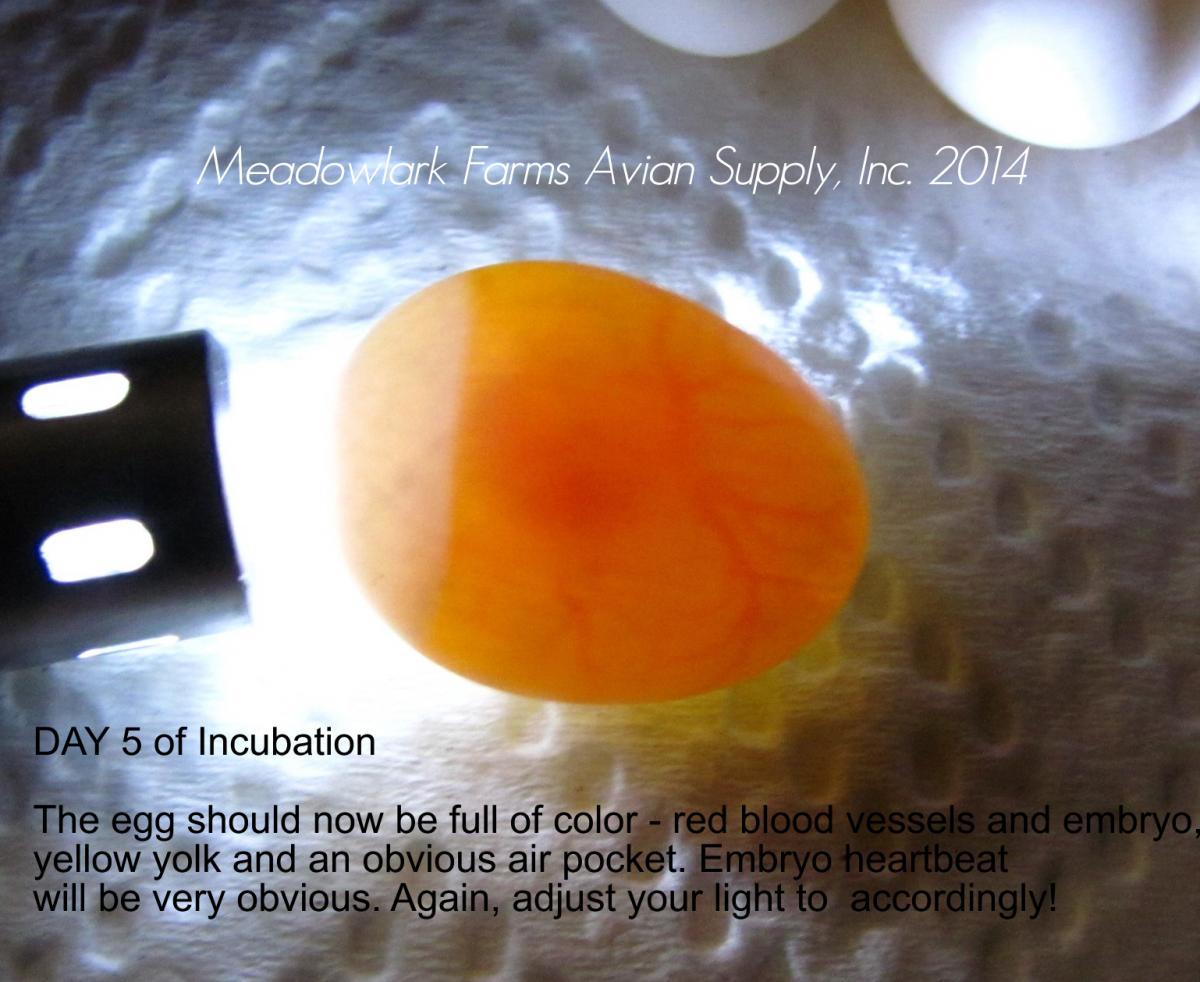
2 – Fertile
3 – Addled (see the air pocket – the egg is solid yellow within)
Twins will rarely survive. I’ve had MANY sets of twin yolks in my eggs, but have yet to see any of them mature to hatching. Most become addled at about the 10 day mark.
.JPG)
.JPG)
.JPG)
.JPG)
.JPG)
.JPG)
Air bubbles almost always end up in a “dead in shell” chick (the blood ring started with air bubbles):

Other signs of Infertility:
In most cases, eggs that “bob up” so that one end sits higher consistently as you move them are usually eggs that are not viable. In many cases, a blood ring may appear, then the egg will become addled IF it shows any signs of fertility at all. These eggs are safely removed from the nest.
In my aviary, I pay very close attention to when the hen begins to brood consistently. If I see any egg that does not show viability within 5 days of brooding, I remove that egg. If the clutch is small, I may leave the egg to support the chicks when they hatch, but I have found it is better to remove it to avoid accidental breakage which would foul the nest and cause a bacterial issue that could affect the chicks.
Bobbing Eggs:
In addition to determining fertility and viability, this method is FUN! It is something old-time breeders used to do on a regular basis, but has since gone by the wayside with the arrival of new fangled egg candlers.
Using a container deep enough for the egg to “float”, fill a dish with WARM water – I test the water on my wrist to make sure it isn’t “hot”, but is warm enough that it won’t shock the chick in the egg. 90-95 degrees is perfect.
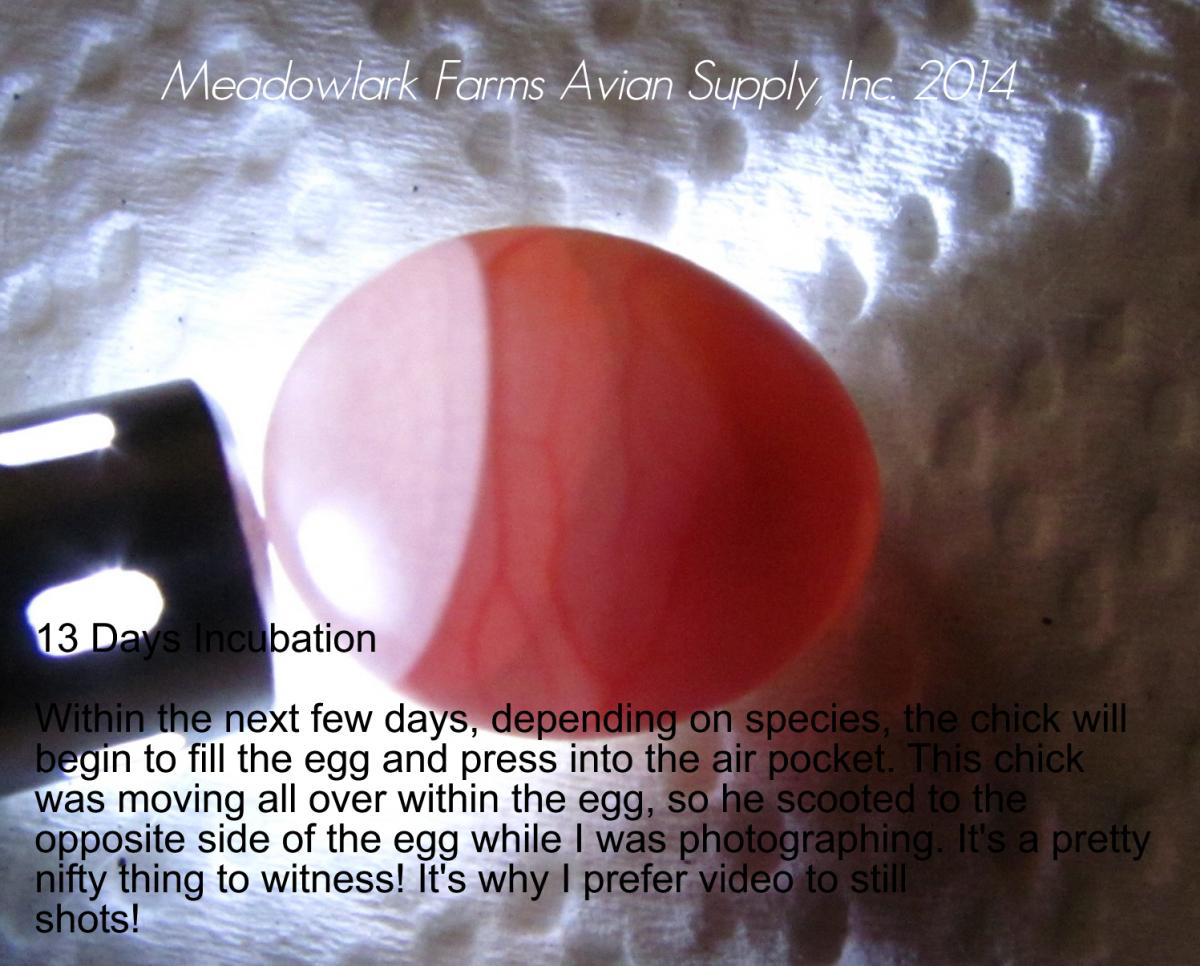
Place the egg in the water filled container then watch closely. If the egg is viable, the chick’s heartbeat will make the egg “bob” and move around as it floats in the container. If the chick is dead in the shell, the egg will not “bob” or move.
BUT, you must be patient. Sometimes the movement is very subtle. If the egg is early in gestation (less than 7 days), the chick may not have a strong enough heartbeat to move the egg. But any egg greater than 7 days should begin to bob within seconds of placing it in the water.
Yes, it is VERY cool!