Beak, Claw & Leg Issues - Non-Parasitic
in Gouldians & Other Small Finches
Kristen Reeves, Meadowlark Farms Avian Supply, Inc.
Beaks and Claws can become overgrown for a variety of reasons. Keeping them trimmed is recommended - and all part of good animal husbandry practices! If you are seeing unusual growth in your birds beaks & claws, it’s time to take a good look at the nutrition and the types of perches you offer in your cage.
OVERGROWN BEAK
There are many reasons a birds beak may become overgrown:
- The bird may not be the greatest at personal hygiene and does not wipe its beak on rough surfaces to prevent the overgrowth. Placing a sandy or cement perch at the drinker will give the birds something to wipe their beak on. As they wipe, they also trim and condition their own beak. This is the most natural way to keep beaks trimmed up.
- It has been said that over medicating a bird will cause its beak to grow too long and/or malformed. Some medications are extremely harsh and can prevent proper nutrient absorption if used too often, which may then translate into malformed beaks or curled claws. If you find a need to medicate your birds often, you can expect to see overly long beaks and sometimes malformed beaks. Never medicate your bird without first consulting your Avian Veterinarian. You could be causing more damage than good.
- Oddly enough, an overgrown beak can be a sign of calcium deficiency. Verify you have plenty of multi-branched, multi-sized perches and ample room for your bird to exercise, and you have some rough surfaces for them to wipe their beaks on. If you still find their beaks grow quickly, it is time to reevaluate your nutritional program. There is a fine line between not enough calcium and too much. Offering them a dish of grit that has BOTH soluble and insoluble forms of calcium will allow them to take up calcium when they need it, and avoid it when they don’t.
- Overly rich foods such as Breed/Molt diets can cause beaks and nails to grow excessively long in a short period of time. Again, if you know your perch situation is optimal but are still seeing overly long beaks, it is time to reevaluate your nutritional program. Most wild birds have a cycle of seasons during which food items will change due to availability. There will always be a period of resting and even austerity of some sort, regardless of species. Be sure to know what your species actually needs and tailor their nutrition to reflect those needs during each cycle. Doing so will eliminate “some” of your need to trim more often.
Beaks may be trimmed carefully with a pair of sharp scissors or nail clippers. It is important that you do not cut too much as the beak will bleed heavily if cut down too far. A simple emery board can quickly take off minimal beak tips, but careful trimming can “train” the beak into shape and keep it short. Trimming beaks & nails is all part of good aviary husbandry and helps to prevent injury. Long beaks & nails can easily get caught in nesting material and cage bars. Keep ‘em short to keep ‘em healthy!
OVERGROWN CLAWS
Overgrown claws can also be a symptom of over medicating or calcium deficiency, however many birds just aren't getting the right type of perch. In the wild, birds would find a wide variety of branches and perches. They’d forage on the ground, making contact with sandy or rocky areas as well a dirt and grasses. All of this interaction with rough surfaces keeps their claws down naturally.
Despite our best efforts, birds in captivity just don’t have the perch variety they’d see in the wild. It is important that we offer them as wide a variety as possible. Cement, sand, rock, wood, and/or plastic perches ranging in size from very tiny to somewhat large should be used in your cages. But even with a broad range of perch types and sizes you may still need to trim them if they become overly long.
Long nails can get caught in nesting hairs or other cage accessories. The nail can rip out and cause bleeding, and a missing nail can result in breeding issues. Use a sharp pair of scissors or nail clippers and trim just the tip of the nail, making certain not to cut the “quick”. The quick is the blood vessel that runs through the nail and can usually be seen if held up in front of a bright light.
TRIMMING BEAKS & CLAWS
BEAKS-
In my aviary, I trim breaks and nails at the same time. I typically try to leave breeding pairs alone unless the rich breeding foods have caused excess growth, but everyone else is fair game! If they need it, they get a good trim!
I personally prefer a pair of nail clippers made for babies - the very small ones that look like the bigger ones for adults. I find them easier to handle, and they aren’t so bulky as to block my view while trimming - USE WHAT WORKS FOR YOU!
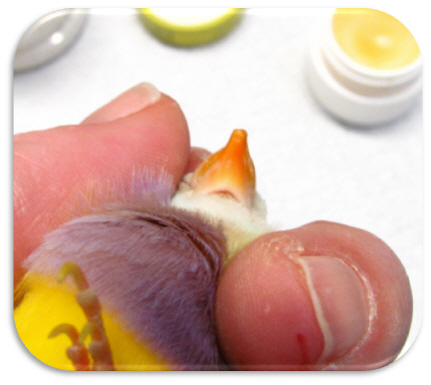
If the beak is crossed, take the bird in hand and look closely at the beak to decide what needs to be trimmed before you actually do it. The ultimate goal is to trim so that the top meets the bottom when the beak is closed in a natural position. You want to try to trim the crossed portions off first - crossed portions are typically very fine and thin and file easily, so if you are uncomfortable trimming these, you can use a nail file (I use an emery board) to get the bulk off, then carefully trim any additional excess with the clippers!

I'm right handed, so hold the bird in the palm of my left hand with its head between my forefinger and middle finger (see “How to Handle Your Birds”). This allows me to use my thumb to manipulate the bird without it escaping and gives me more control.
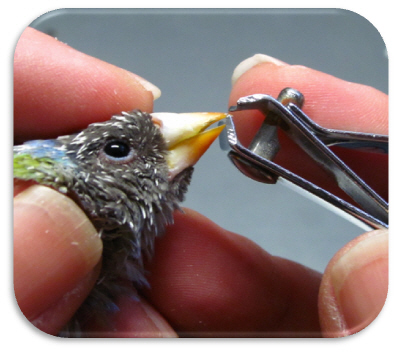
I literally use the clippers to manipulate the beak (or nails) into the position I want before I clip by gently holding onto the beak or nail with the clippers, then turning or tipping them so that I can clip only what needs to be trimmed.
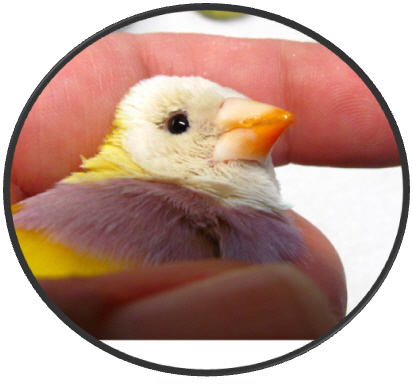
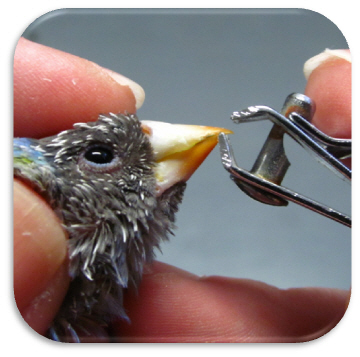
Trim “crossed” portions first - anything that extends beyond the natural line of the beak - and only trim tiny bits at a time until you get to a basic natural beak shape. Once that is complete, inspect again to see where the top and bottom should meet naturally. I take the open clippers and place them against the bottom edge of the top beak portion, making sure to meet the longest front edge of the lower beak, then “tip” the clippers slightly away from the bird so as not to clip too much. This will leave the top beak portion ever so slightly longer than the lower.
Once both the upper and lower portions are clipped satisfactorily, look to see if any filing is necessary - which may be the case if the beak was crossed or overly long.
I have birds here who will sit perfectly still while I trim, and others who try to bite me and keep their beaks open the entire time making it a bit more difficult. For those birds, I use my forefinger to hold their upper beak still, while using the clippers to gently force the lower beak shut.
Occasionally they will shift their beak so that the lower does not close in the natural position. This is merely a patience thing! Eventually they will give up fighting you and relax so that you'll be able to clip! Patience is a virtue when it comes to clipping beaks and nails. You want to make sure you are not in a hurry - if you rush, you could end up cutting too much.
If you are concerned about cutting too much and causing bleeding, keep a dish of blood stop powder or a styptic pencil handy just in case. I have never clipped a beak too short (nails sometimes) as there is more beak before quick than with the nails.
If you are clipping for the first time, just take your time and move slowly - you'll be just fine!
While you've got the bird in hand, check the nails too! As mentioned above, a higher protein diet (typically given during breeding and/or molting) can lead to faster growing nails and beak - and if the beak is long, I usually see long nails here too! That way you won't have to catch the bird again
for nail trimming and cause undue stress!
 Once trimmed, I personally like to dab a little Carmex or Vaseline on the beak, legs and nails to condition the beak and deter scaly mites. I tend to see less peeling and dryness during the molt when I do this - you do not need to do this if you don't feel it is necessary! It's just my personal preference!
CLAWS -
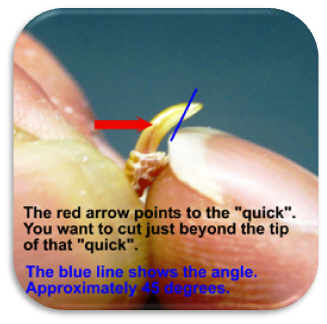
I always trim nails so that they are angled (hence the tipping of the clippers away from the bird). What I'm looking for is an angle that allows the nail to make exact flat contact with the perch so that I don't have to trim as often. I call it a “show trim” - but as far as I know, it is just what I call it. Just remember, this is my personal preference - others may have a different way of going about it!
 I keep the bird in my left hand holding its head firmly between my first and middle fingers. I use my thumb and forefinger (and sometimes my middle finger if the bird is fidgety) to pull the leg up and separate the toes, holding them between the rest of my fingers (yes, while still holding the bird! It does take practice, so hang in there! You'll be an old pro in no time!). I spread the toes like you'd fan cards then literally use the clippers to manipulate the nail into the position I want and clip on an angle “away” from the bird so that the nail looks natural.
I try to remember each time I trim that it is like carpentry - measure twice, cut once. In other words, be sure you have the clippers exactly where you want them before you clip so as not to clip too deep and cause bleeding!
If for some reason you do clip too deep and the blood stopping agents don't seem to work, place your finger over the tip of the bleeding area and apply pressure for as long as it takes for the bleeding to stop. I've actually found pressure to work better and faster than any of the blood stop meds, but I keep a dish of diatomaceous earth around anyway!
TIP!!
I will sometimes hold the bird in front of a bright light so that I can see exactly where the quick is - especially in young juveniles whose nails are still dark in color, or with the societies whose nails grow like weeds and are almost all black. This allows me to see exactly where to cut.
NOTE: an interesting item I've noticed...Sometimes when I clip nails I notice the blood in the quick zip backward in the vein - almost as if someone were sucking the blood back through a straw. I've realized that this usually only happens in nails that really don't require trimming yet, but may be just a tad long. The pressure from the clippers forces the blood back up the vein. It is NOT something to worry about, and as far as I can tell, does not cause the bird any pain. I try to record this information for future reference when trimming that particular birds nails again, so I know not to clip as short next time!
CURLED or "SLIPPED" TOES
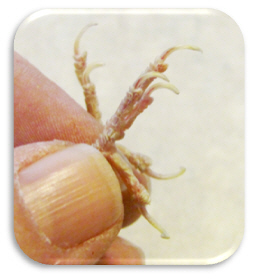
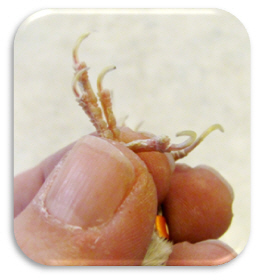
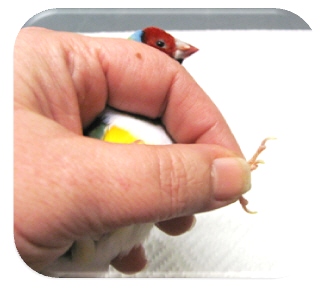
Makeshift Cast for Curled or "Slipped" Toes: While not usually considered an actual emergency, splayed legs and curled toes can often keep the bird from perching and occasionally from reaching their food and water sources. Typically arising from chicks in an overcrowded nest or poor genetics, splayed legs and curled toes are not life threatening. The bird will usually overcome this adversity and live a long, happy life - as long as they can get to food and water. We've run into a handful of foot issues with our show line of Society finches. In the case of these birds, it an overcrowded nest issue and not a genetic issue. Our hens are very overzealous in their production of chicks.
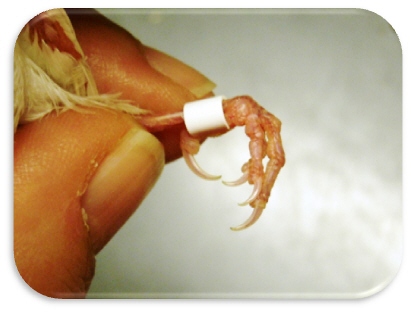
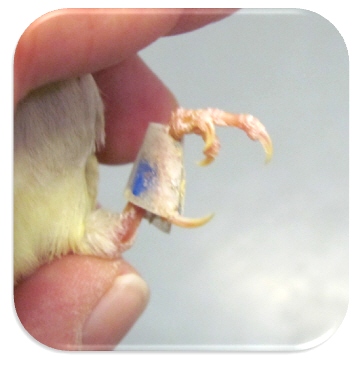
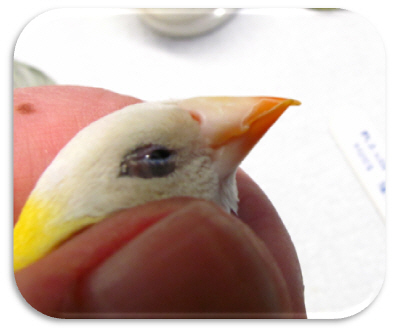
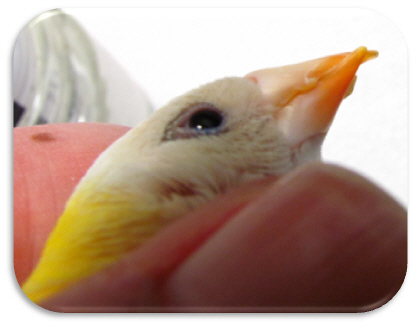
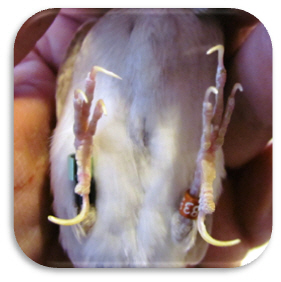
As shown in the photos above, to correct the curled toe situation we used a plastic band for the Society's foot, and tape for the Gouldian. We opened a split plastic band with a band spreader, then while holding the toes completely open, placed the band over the foot at the knuckle to hold the affected toes in place. It is often necessary to have the band slightly pinch the back toe, but this has yet to cause a problem with any of our birds. The band does not put on enough pressure to cut off circulation. If your bird is young enough and has not yet been banded, you can use a closed aluminum band for this procedure. In fact, I prefer them. But you need to be certain you have a good band cutter on hand that will cut an aluminum band in case the bird grows enough that the band becomes too tight. You will also need to keep the bird under constant surveillance. Bands can get tight very quickly - literally over night.
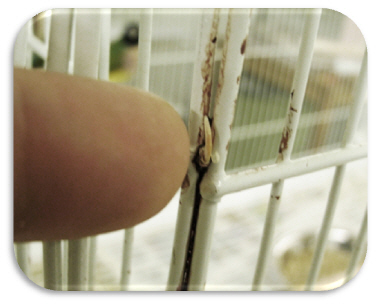
Once we place the band over the toes, we will usually wrap the foot with a waxed florist tape to keep the bird from pecking the band off. The tape is cut into extremely narrow strips, then wrapped only a few times around the band and foot. Because the tape is waxed, it sticks to itself. This keeps the tape from adhering to skin or feathers and is easily unwrapped for inspection and reused. However, if the tape or band becomes soiled, we change them!
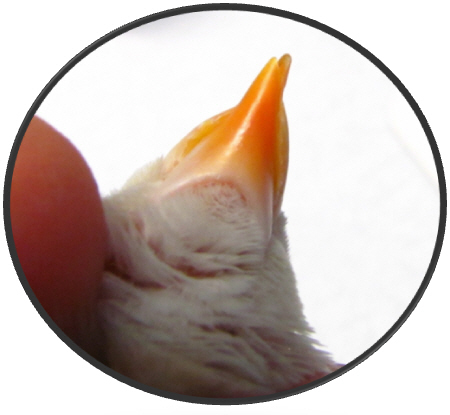
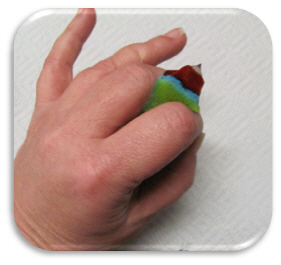
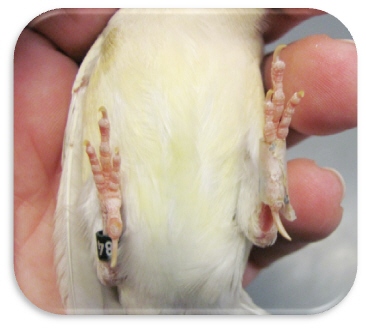
When we use Scotch Tape to wrap the feet, we do it much the same - hold the toes out straight from the ball of the foot, and using small strips we've cut to fit, wrap them around the toes. Tape tends to be more effective for Gouldians than the band applications do because Goulds like to bop around on the cage floor, getting dust and seed hulls stuck up inside the tape and loosening it. They must be watched carefully because they will often fall off within a day. I typically replace them daily to prevent other issues such as infections from a build-up of dirt. Young birds may end up with sores on the hind toe if it is the only toe not wrapped (as in the case of the bird in the photo below - foot on the left, hind toe).
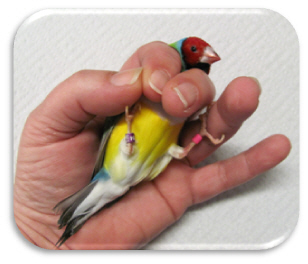
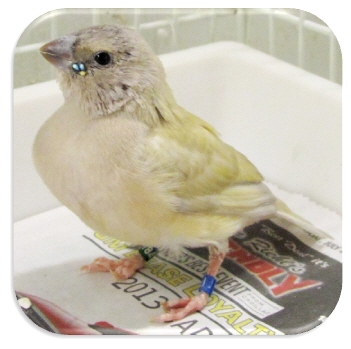
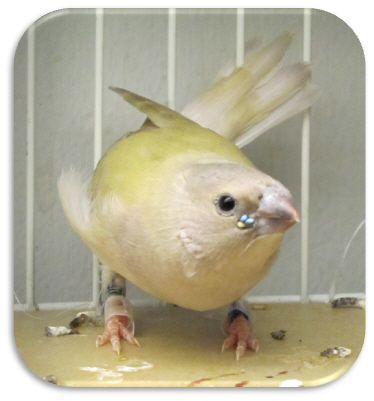
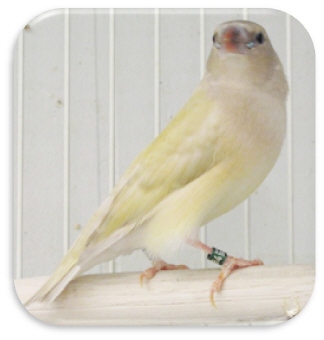
If used on young birds from the moment the issue is noticed, these methods usually correct the issue in about six weeks. The younger the bird, the more likely the outcome will be favorable. Older birds take much longer, and oftentimes the problem is not correctable. Constant monitoring of the tape and band must be done to ensure the bird does not remove them or get tangled in cage accessories. The photo below shows the same Gouldian after successful correction of his slipped toes.
Birds rarely have an issue getting around, though young birds will usually take a day or so to get acclimated to the “lump of stuff” on their foot. They may flounder a bit on perches, but as long as both feet are not affected, they will quickly grow accustomed to the makeshift cast. It is highly successful, but CONSISTENCY IS KEY!
FINAL WORD...
The information contained here is for reference purposes only. As always, if you suspect your bird is sick, take it to an Avian Veterinarian!